On to the review!
 Security policy
All stored data is secured to prevent unauthorized access
 Delivery policy
we are committed to delivering your orders quickly and securely
 Return policy
customer satisfaction is our priority. If you are not completely satisfied with your purchase
First things first! This is a dual battery mechanical mod, as such there is no regulation and you are getting the full power of your batteries supplied directly to your atomiser.
If you don’t understand Ohm’s law, battery safety, and how to build to your mod, you probably shouldn’t be having a go until you’ve given yourself a good grounding! (If you’ll pardon the pun)
That out of the way, the Dovpo Clutch X18 is a bit of an oddity, as the batteries are arranged in parallel. This compares to the far more common series mods, where batteries can be stacked one on top of another, to double the power.
The difference is that with a parallel mod, the amount of voltage being supplied to your atomiser remains the same (so, 4.2V from freshly charged batteries). But the load in amps is spread over the two batteries, and the capacity or how long you can vape for, is doubled.
So no, you will not get double the amount of “power” with a parallel mod, but you will be able to vape for longer, and it will perform at its peak power for longer because of this.
This was sent over by Dovpo for review (thank you), as usual, I am not swayed by freebies and I shall report back honestly with what I find.
 Specs
SpecsThe Clutch X18 comes in a choice of 6 colour ways at launch, Red, Blue, Green, Black and Gunmetal Grey.
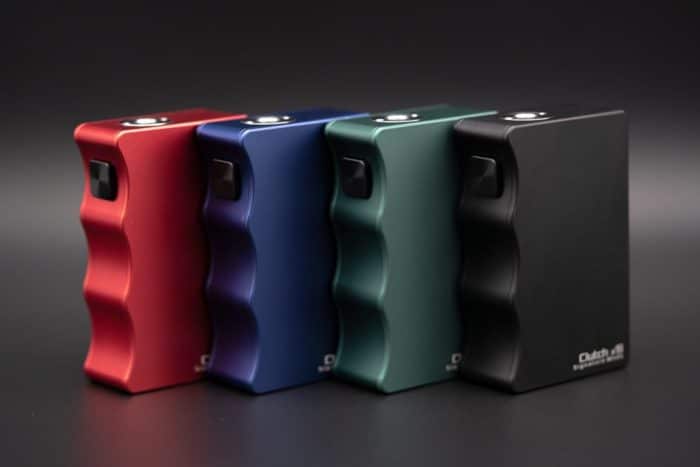 Although I’m sure there will be many interesting variations on these in the future, as there have been with the original clutch.
The body is machined from a solid billet of aluminium, and as such it feel very rigid whilst still being quite lightweight. It’s then bead blasted and anodised, giving it a very silky premium feel.
As mentioned previously, this is a mechanical mod. As such it is really important that you know what you’re doing with it, and you have a good grasp of ohms law and the safety concepts around battery safety.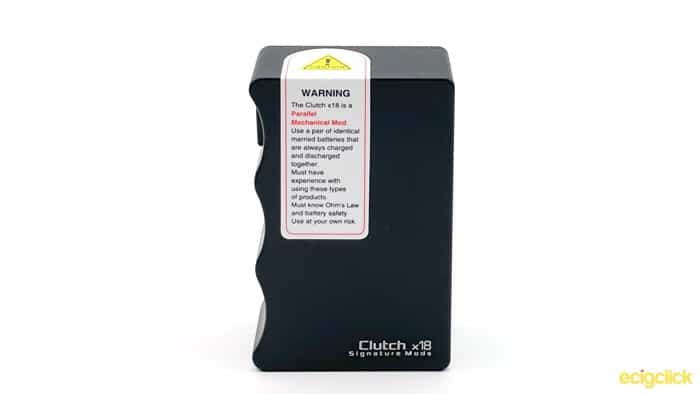
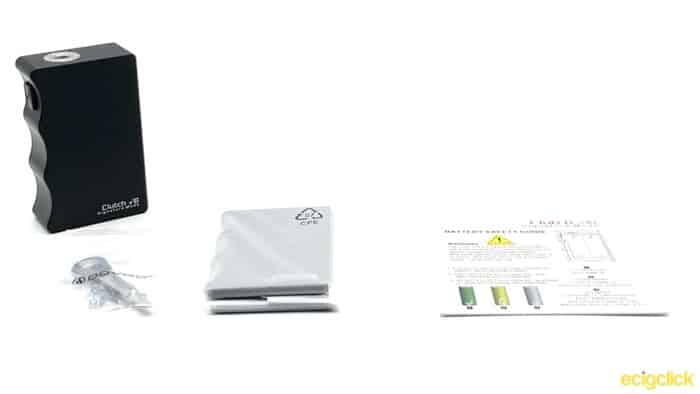
Because of this, it’s really good to see a big battery warning information sheet as the first thing when you open the box. Even more than that, there is a sticker covering the mod which you have to remove before you can use it.
You should always use married batteries in a mod like this, ie. ones that have always been charged and discharged together.
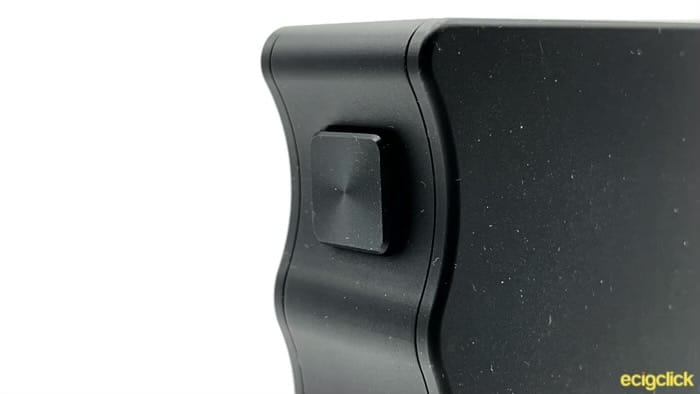
The fire button is a lovely metal square, with some texture to the front of it. Signature Mods know that this is one area that people often like to customise, so I’m happy to say that it is fully compatible with the Clutch 21700 buttons.
It’s got a really positive throw to it, and I love how solid it feels.
 Other than the fire button, the only other control you have on the device is the little safety lock switch on the rear of the device (the other side from the one you put your batteries in).
This mechanical switch just rotates a little blocker, that when locked will prevent the switch from depressing and making contact.
It’s a relatively simple design, but it’s been well thought out and acts exactly as you would want it to. There’s no chance of it getting moved accidentally, and it gives a lot of reassurance.
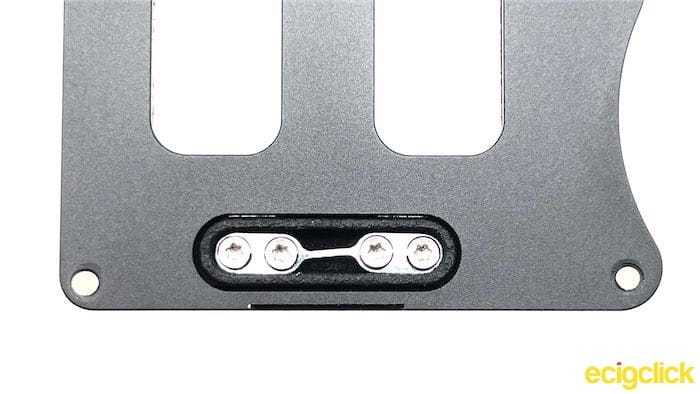
Speaking of reassurance, one of the new things from the original clutch is the introduction of a fuse in the base.
This little piece of metal is secured by 4 torx screws, and has a 37a limit. Basically if you try to push more than 37a through it the metal will break in the middle and cut the connection.
Please Note: This fuse is only designed to stop you placing the batteries the wrong way up. If you accidentally install them in series (one up, one down) it will break the fuse. If you were to place a super low resistance build in there or you get a short in your atomiser, it will not protect you.
This is a physical reverse polarity protection (something I’ve never seen before in a mech mod). It is not a safety feature to protect against an atomiser short.
 This is a great way of giving you a little extra safety. If you want, Signature Tips will be selling a solid metal bridge to remove this safety feature, but honestly I’m not sure why you would want to.
The only criticism I have of this is that although they give you a bag of 5 extra fuses, in case you are unlucky enough to blow one, they don’t provide you with a tool to unscrew them and replace them.
So bring your own screwdriver!
Looking at the base of the mod, you can see all the expected regulatory marks, as well as the logos of those responsible for its creation. Signature Tips, Mike Vapes and Dovpo.
The other thing that should be obvious is the two flat headed screws. These are your battery contacts, and you screw them down to make contact with the batteries.

I was slightly worried by this at the beginning, as once you screw them down, the batteries can be held in place quite firmly (however don’t over tighten, as you don’t want to damage your batteries!).
In the event of something going wrong, the first thing to do is always to get your batteries out the mod quickly, so I was worried this wouldn’t be easy.
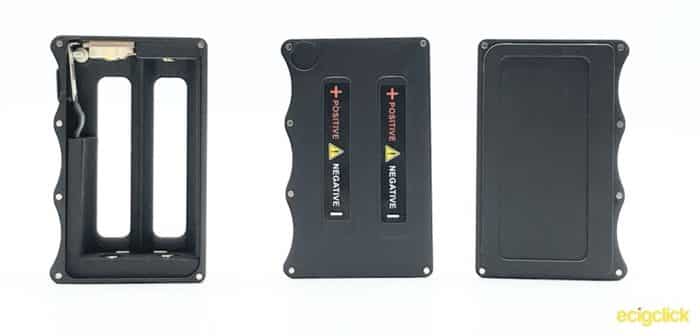
However, because you can take the door of the back of the mod as well, you can push the batteries out from this side.
As a quick tip, always screw down your atomiser before inserting the batteries and screwing down the negative screws.
Speaking of the doors, you get two sets in the box. This is such a simple thing for them to have done, but it’s a really welcome touch. They attach onto the body of the mod with 6 magnets each, and once they are in place there’s absolutely no movement from them.
 The standard doors that come on the mod allow for up to a 25mm atomiser without overhand.
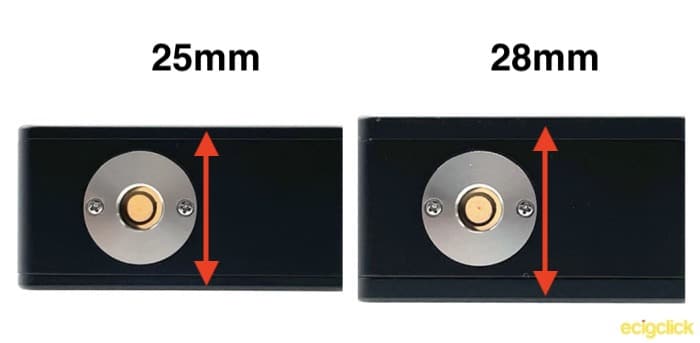
However, swap these out for the thicker doors and you can now go up to a 28mm.
You’ll also notice how the rear doors have a nice big polarity indication on them. Both batteries go positive side up.
Taking the doors off the mod you can see straight through to the other side. There is a 3d printed battery self that fits inside with your contacts. If you ever need to take this out, then you just need to screw the battery screws all the way in.

On to the review!